

DryRod Quantity Calculator
Installation Guide
-
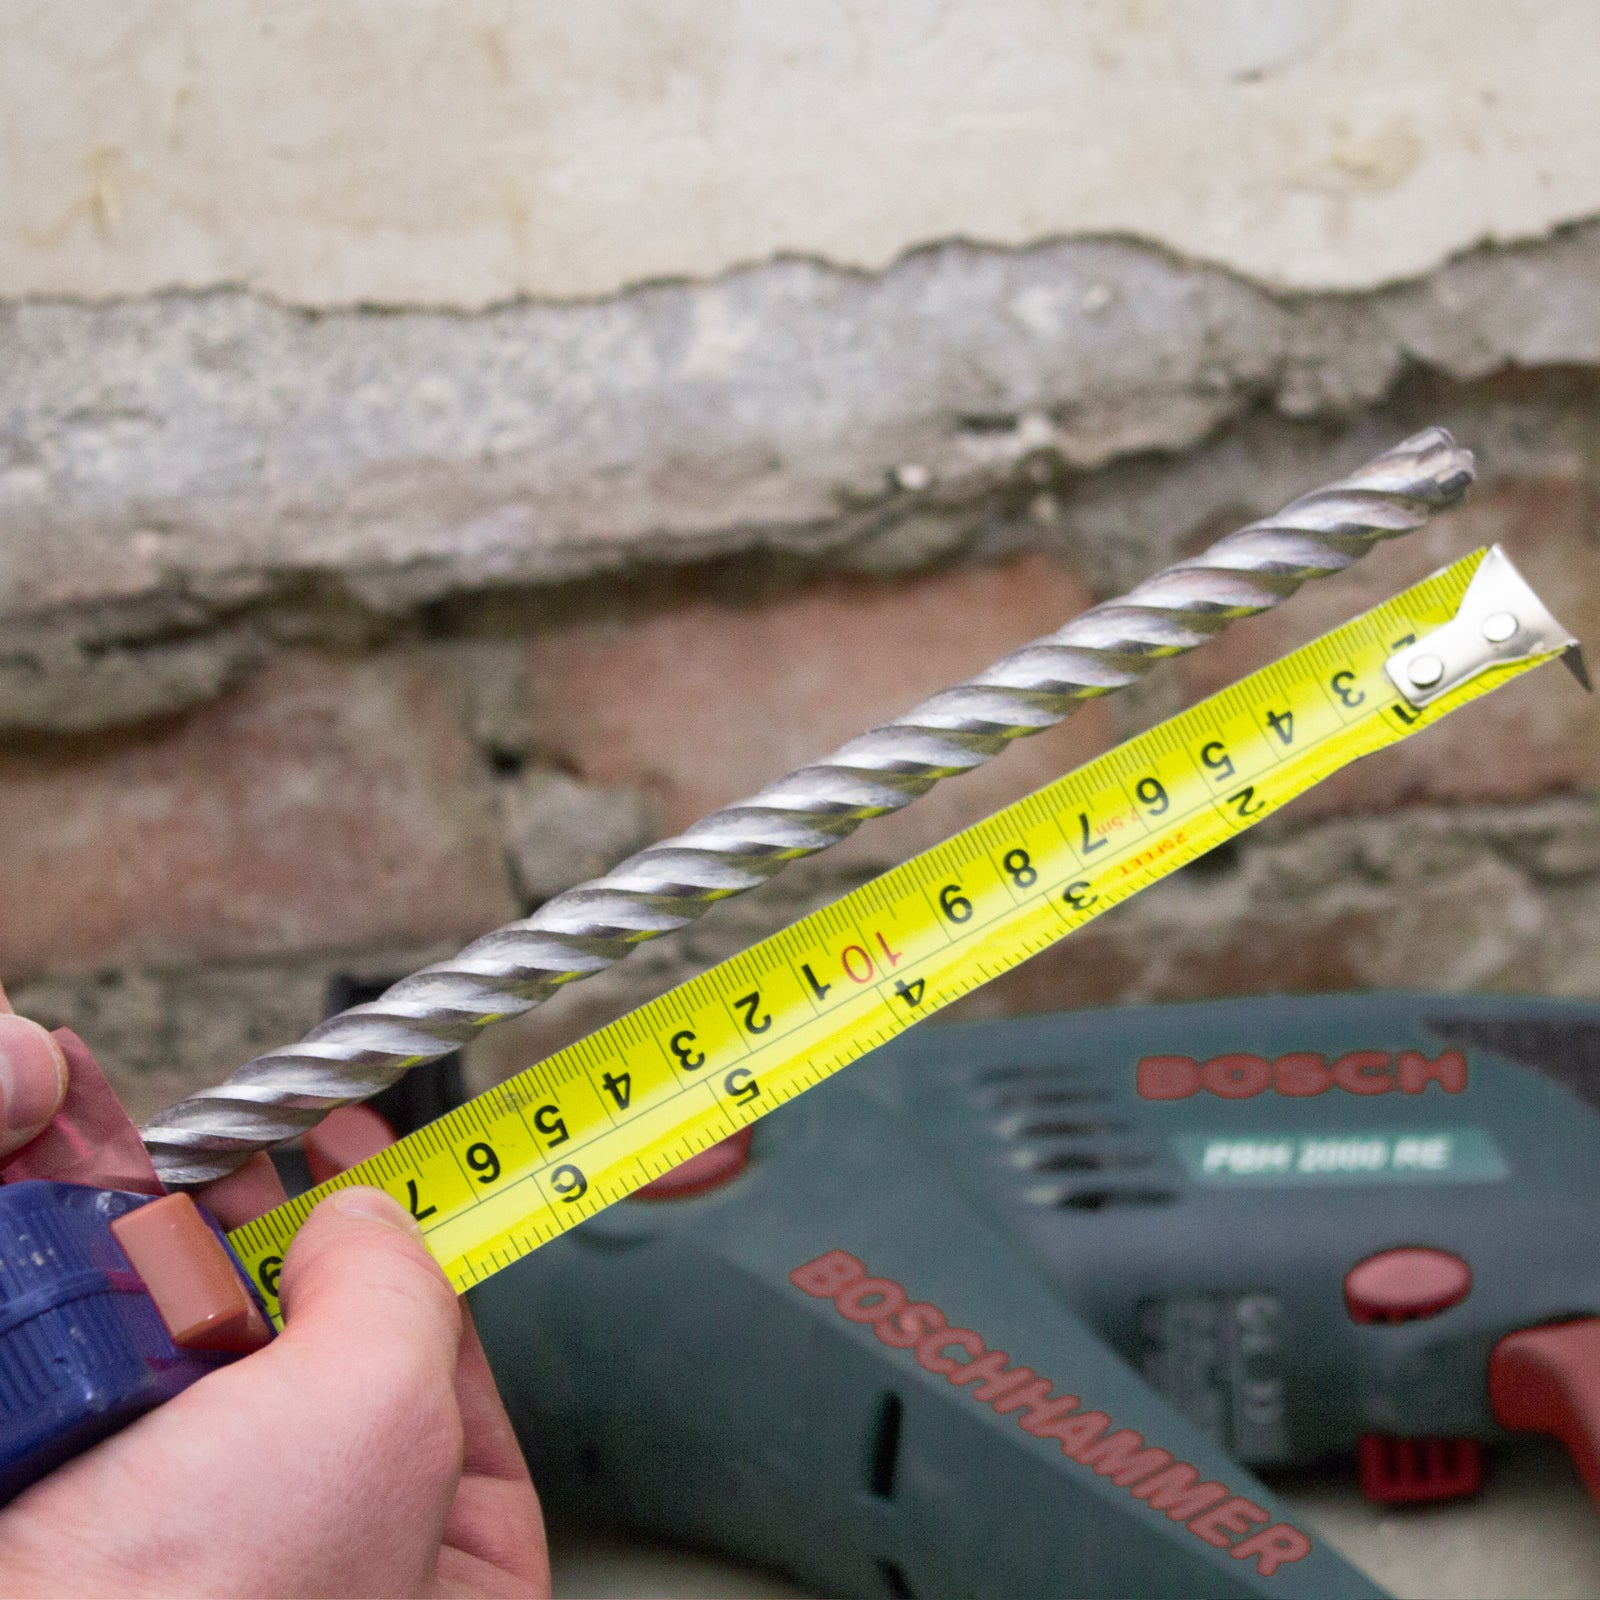
1. Mark Drill Bit
Mark your drill bit to drill to within 10mm of the far side of the wall you are treating.
Be sure to use the rotary hammer mode on your SDS drill.
-
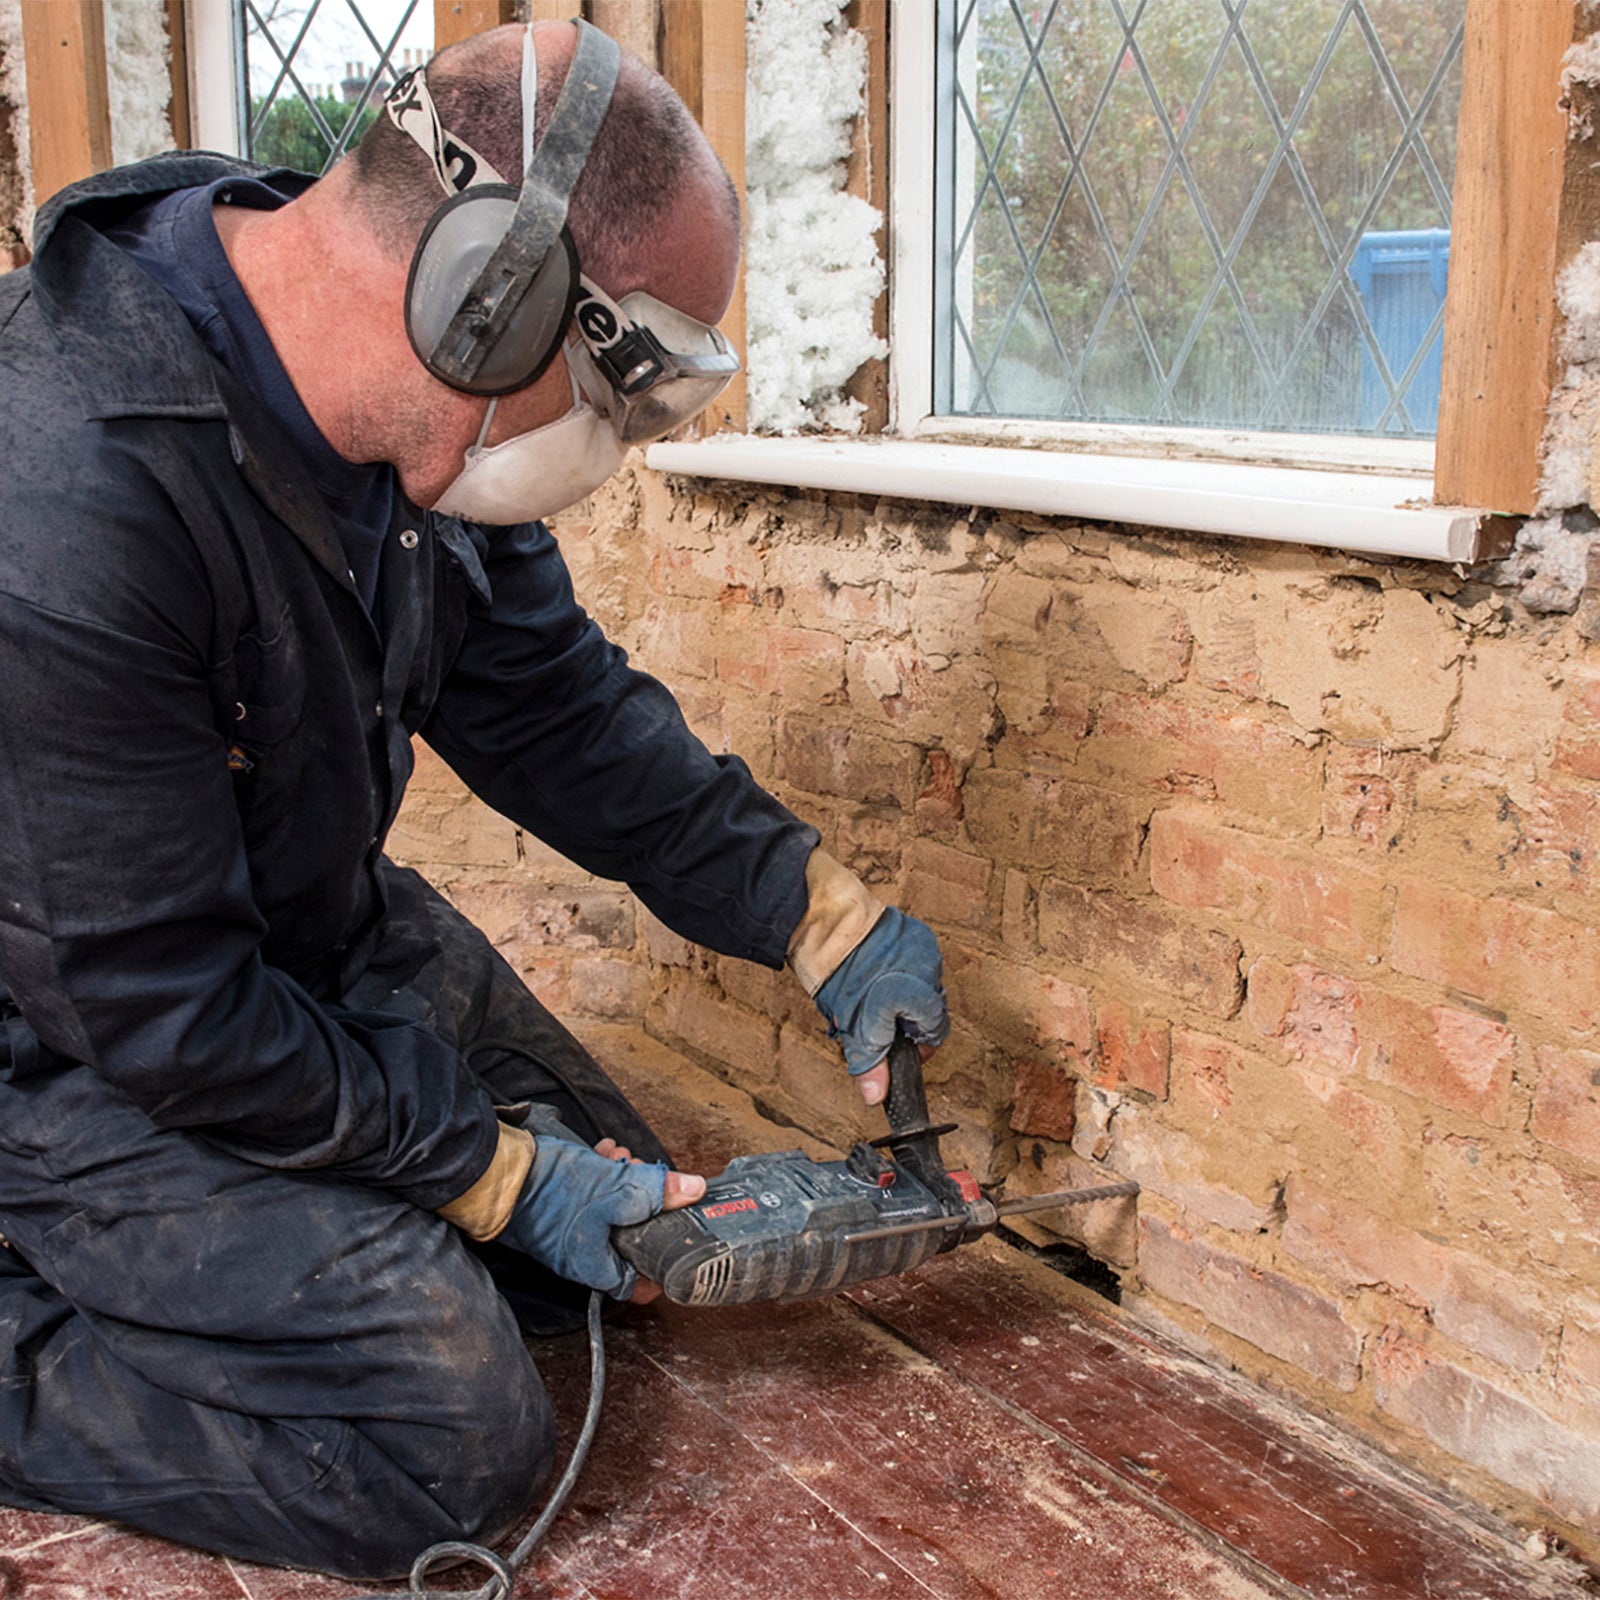
2. Drill Holes
Drill into the lowest mortar course above ground/floor level at 120mm centers.
Reduce the pressure on the drill as you get to within 30mm of the far side of the wall to prevent damage to the other side of the wall.
Make sure the hole is clear of debris by moving the drill bit back and forward.
-
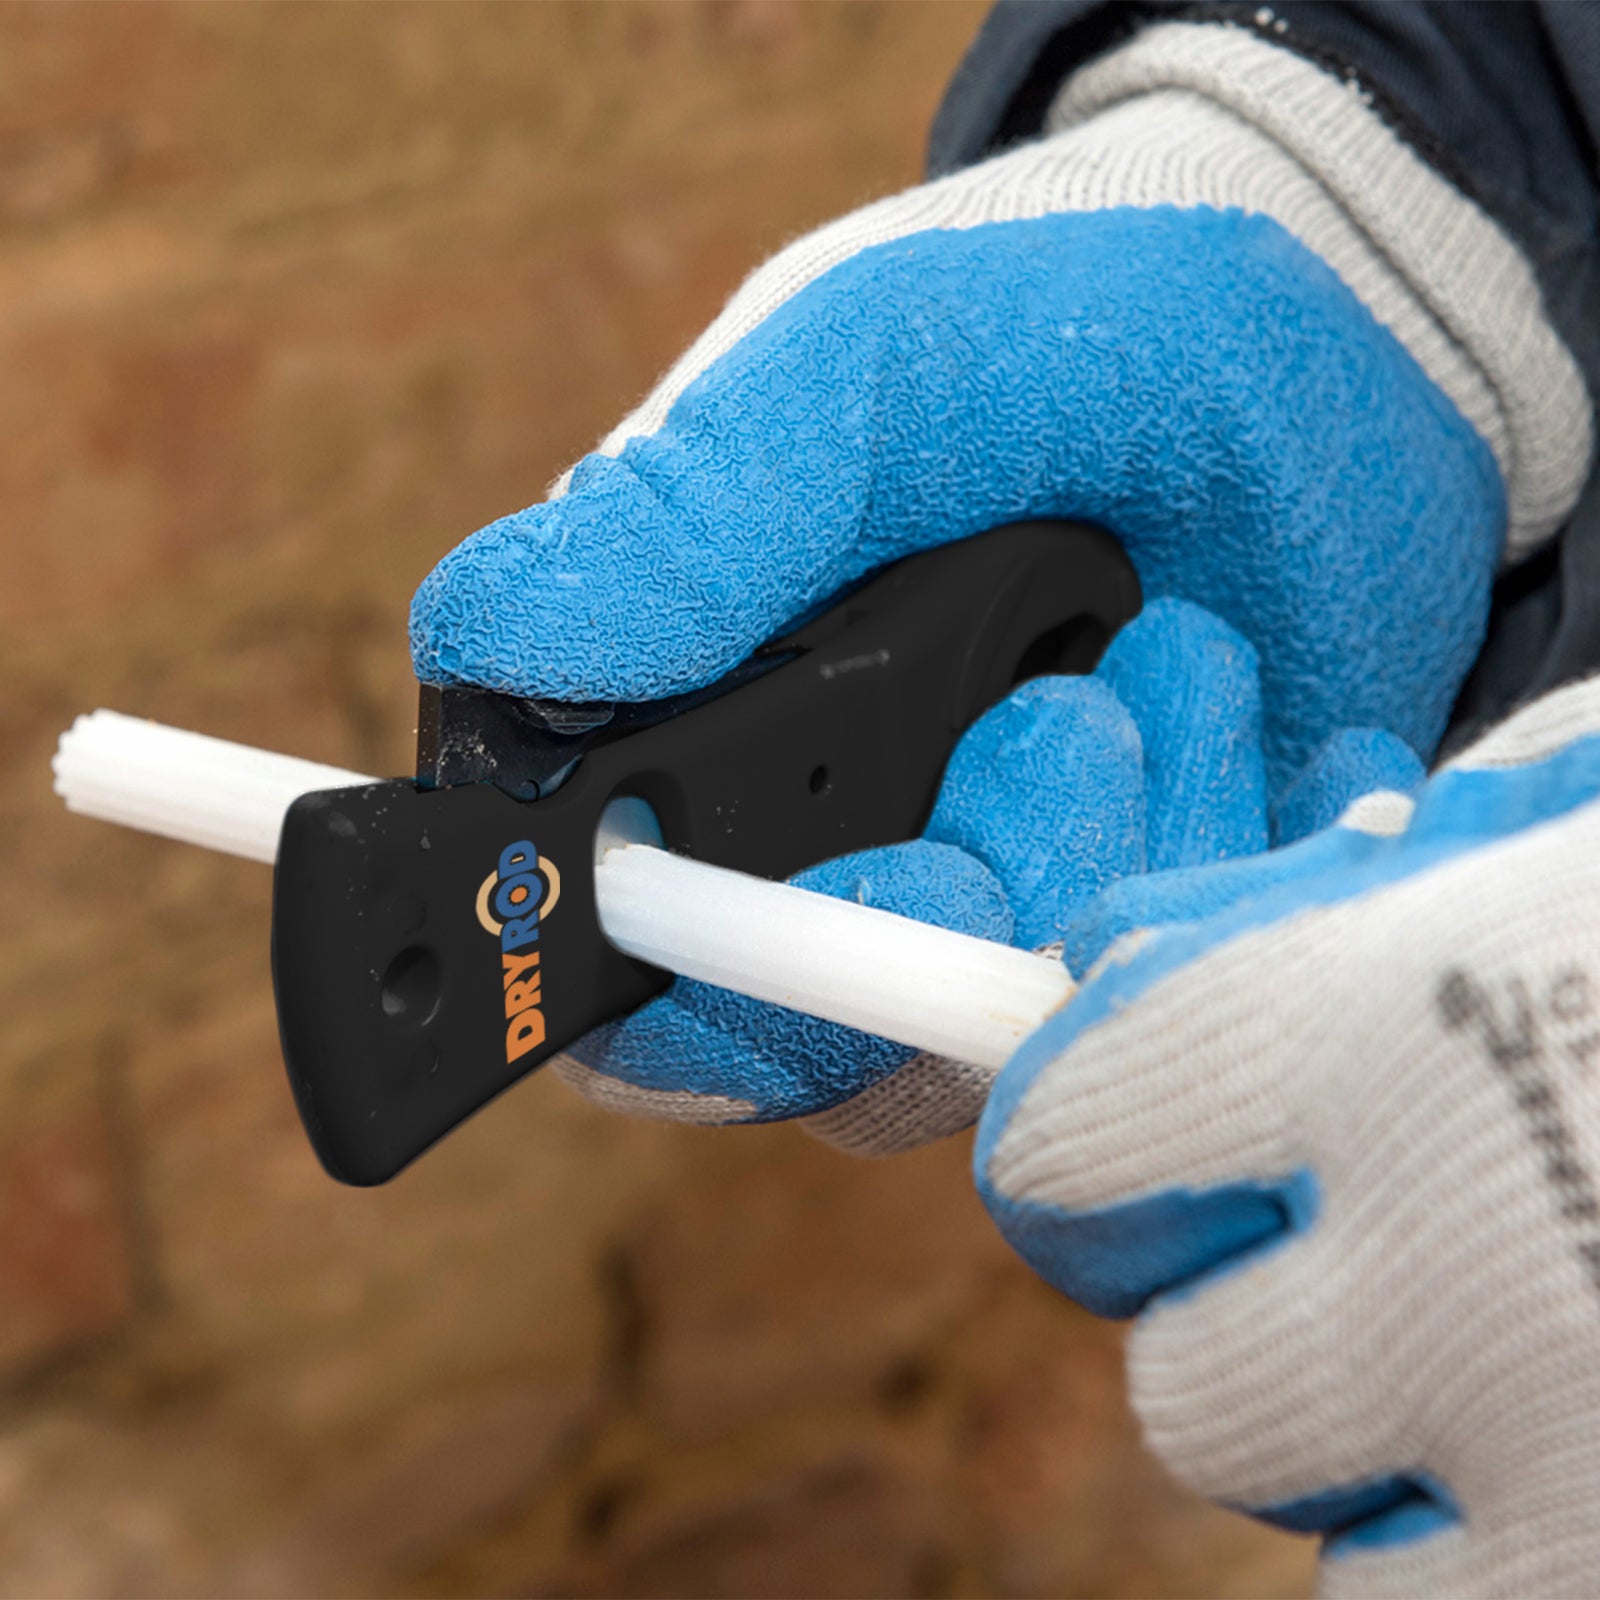
3. Cut DryRod to Length
A DryRod is 180 mm long, ideal for treating solid double brick walls. For single brick walls, cut each rod in half using garden secateurs or a similar tool. For 300 mm walls, insert 1.5 rods per hole. In thicker walls, rods can be inserted from both sides.
-

4. Inserting Rods
Push one Dryrod into each hole to within 10mm of the other side. No special tools needed.
Leave wall to dry out naturally. Replastering may be required depending on salt contamination.


